Animating text along a path (it’s easy)
Scroll down to make the rabbit go dowwnn the hole, and for a short explanation of the code!
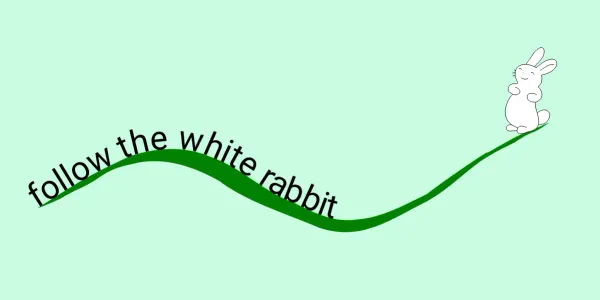
In SVG, you can associate text with a path using the textPath element. That’s some good naming! 😎 Here I associate the text, a rabbit emoji, with a spiral path using the href attribute. You can click the button above to see the path.
<svg viewBox="0 0 100 100">
  <path id="spiral" style="fill:none" d="m42.952 78.49c6.242-0.819 12.4-0.752 ..." />
  <text>
    <textPath id="rabbit"  href="#spiral">🐇</textPath>
  </text>
</svg>
The position of the text on the path is defined by the startOffset attribute of textPath. By default it is zero, so text is at the beginning of the path. By increasing the value beyond 100%, we can make the rabbit go past the end of the path, and disappear down the hole! With a dash of JavaScript we can trigger an animation to do this when it comes into view.
Hopping bunny
Let’s look at another short example with the relevent code this time. We will make our bunny hop along a path! Because the rabbit emoji faces to the left, let’s put her at the end of our ‘hoppy’ path, so she can hop in the correct direction!
The value of startOffset can be a percentage with 0% indicating the start of the path and 100% indicating the end of the path; or a number indicating a distance along the path measured in the current user coordinate system.
I will use a percentage to position the rabbit with a startOffset of 92%, which places her off to the right of the screen, as the path finishes outside of the screen.
I added a ‘number’ input so that you can change the value of the startOffset manually, a ‘change’ event listener handles the update. Below you can decrease the startOffset value to make the bunny “hop” along the path.
Adjust the startOffset 👆, changing the value will make the rabbit hop!
<svg id="hop-svg" viewBox="0 0 100 70">
  <path id="hoppy" d="m-0.6176 21.616c12.548 1.979 ..." />
  <text>
    <textPath id="hopping-rabbit" href="#hoppy"
startOffset="92%">🐇</textPath>
  </text>
</svg>
HTML
<svg id="hop-svg" viewBox="0 0 100 70">
  <text>
    <textPath id="hopping-rabbit" href="#hoppy" startOffset="92%">🐇</textPath>
  </text>
  <rect y="40.762" width="100" height="21.153" fill="#008000" />
  <path id="hoppy" d="m-0.6176 21.616c12.548 1.979 38.405 10.783 46.564 19.146 6.5763-5.8829 9.1425-15.671 24.241-16.83 17.632-0.23482 17.14 6.0581 31.567 14.668" fill="none" stroke="#000" stroke-dasharray="2,2" />
</svg>
<div class="control">
  <label for="hop-input">startOffset (%)</label>
  <input id="hop-input" list="values" type="range" max="100" min="-10" value="92" />
  <datalist id="values">
      <option value="-20" label="-20"></option>
      <option value="100" label="100"></option>
  </datalist>
</div>
Javascript
let rabbitTextPath = document.getElementById("hopping-rabbit");
let hopInput = document.getElementById("hop-input");

hopInput.addEventListener("change", function (event) {
    let newValue = event.target.value + "%";
    rabbitTextPath.setAttribute("startOffset", newValue);
});
Hope you enjoyed this quick tutorial. Don’t worry, he hoppy! 🐰